


Overview
The Inventory Transfer module is used to move stock from one warehouse to another. It records the transfer details, updates stock quantities, and maintains a history of warehouse-to-warehouse inventory movements.
Navigation:
Inventory → Inventory Transfer
Inventory Transfer List
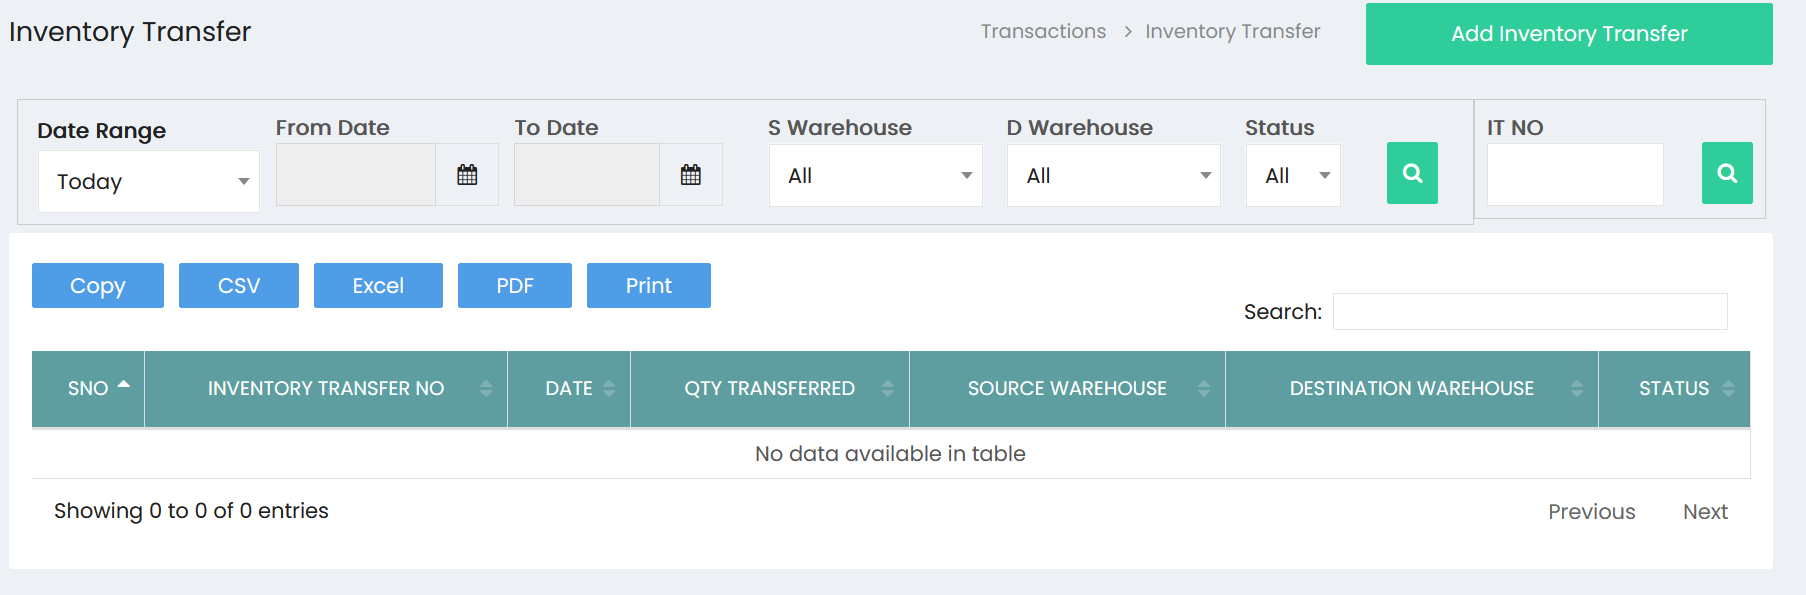
The Inventory Transfer List displays all inventory transfer transactions and provides options to search, filter, export, and print records.
Available Filters
Use the filters at the top of the page to locate inventory transfer records.
- Date Range
- From Date
- To Date
- Source Warehouse
- Destination Warehouse
- Status
- Inventory Transfer No (IT No)
Click the Search button after selecting the required filters.
Inventory Transfer List Information
Each inventory transfer record displays the following information:
- S.No
- Inventory Transfer No
- Date
- Qty Transferred
- Source Warehouse
- Destination Warehouse
- Status
Available Actions
The following options are available on the Inventory Transfer List page:
- Copy
- CSV Export
- Excel Export
- PDF Export
- Search
- Add Inventory Transfer
Creating an Inventory Transfer
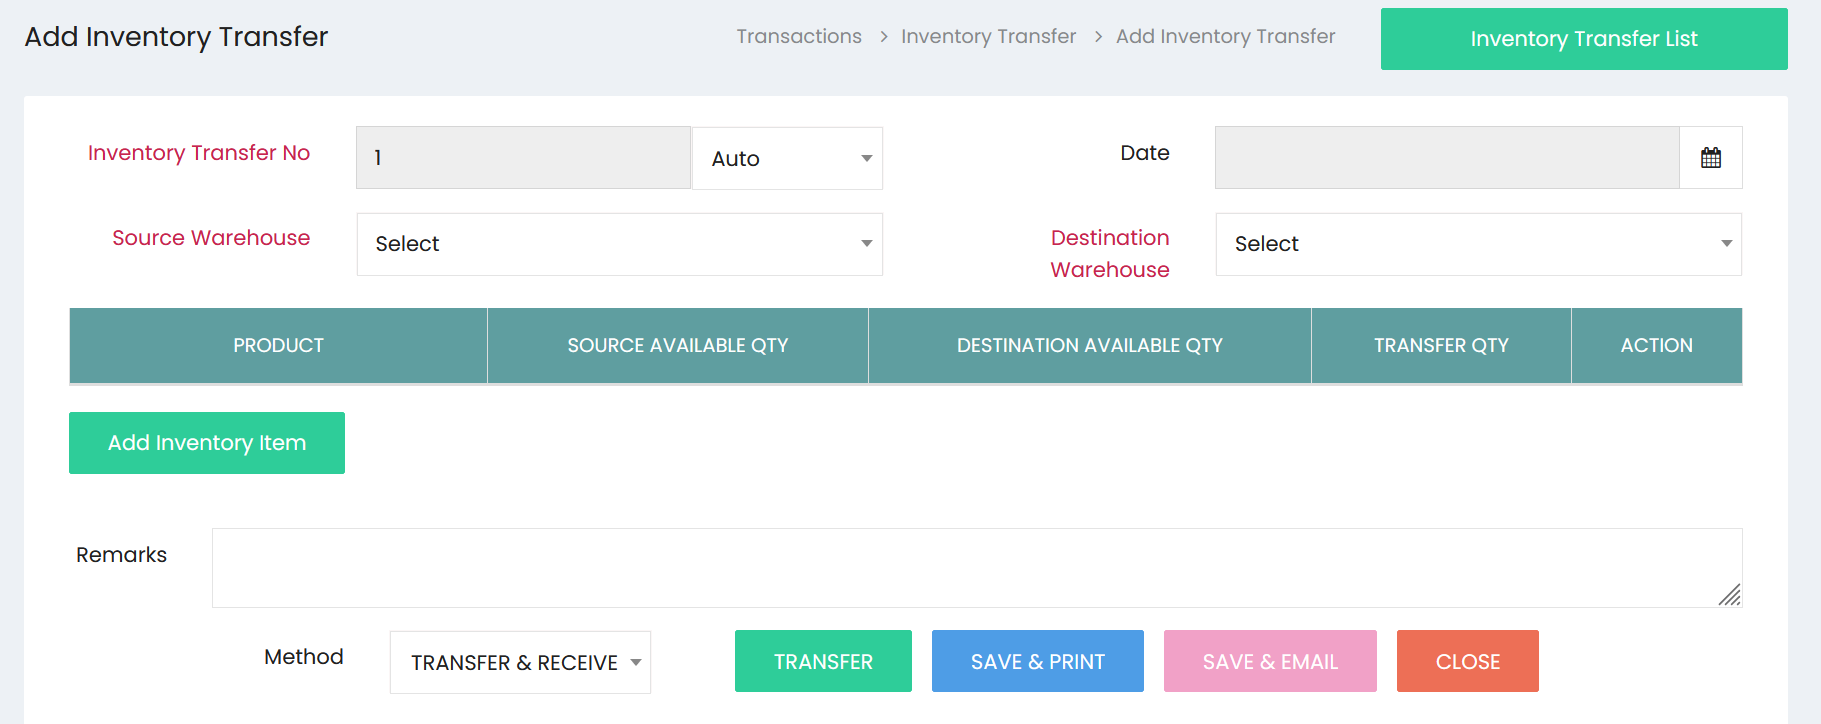
Click Add Inventory Transfer to create a new inventory transfer transaction.
Step 1: Enter Transfer Information
Complete the transfer details.
| Field | Description |
|---|---|
| Inventory Transfer No | Displays the Inventory Transfer number. |
| Numbering Type | Select the numbering method. |
| Date | Select the transfer date. |
| Source Warehouse | Select the warehouse from which stock will be transferred. |
| Destination Warehouse | Select the warehouse that will receive the stock. |
Step 2: Add Inventory Items
Click Add Inventory Item to include products in the transfer.
For each item, enter the required transfer details.
The item grid displays:
- Product
- Source Available Qty
- Destination Available Qty
- Transfer Qty
Step 3: Enter Remarks
Use the Remarks field to record any notes related to the inventory transfer.
Step 4: Select Transfer Method
Choose the required transfer method from the Method drop-down list.
Step 5: Complete the Transaction
After verifying the information, choose one of the following options:
- Transfer – Processes the inventory transfer.
- Save & Print – Saves the transaction and prints the document.
- Save & Email – Saves the transaction and sends it by email.
- Close – Closes the screen without saving.