


Overview
The Material In Note is used to record materials received into a warehouse. It captures the receipt details, source, warehouse, items, received quantities, and related notes.
Material In Note List
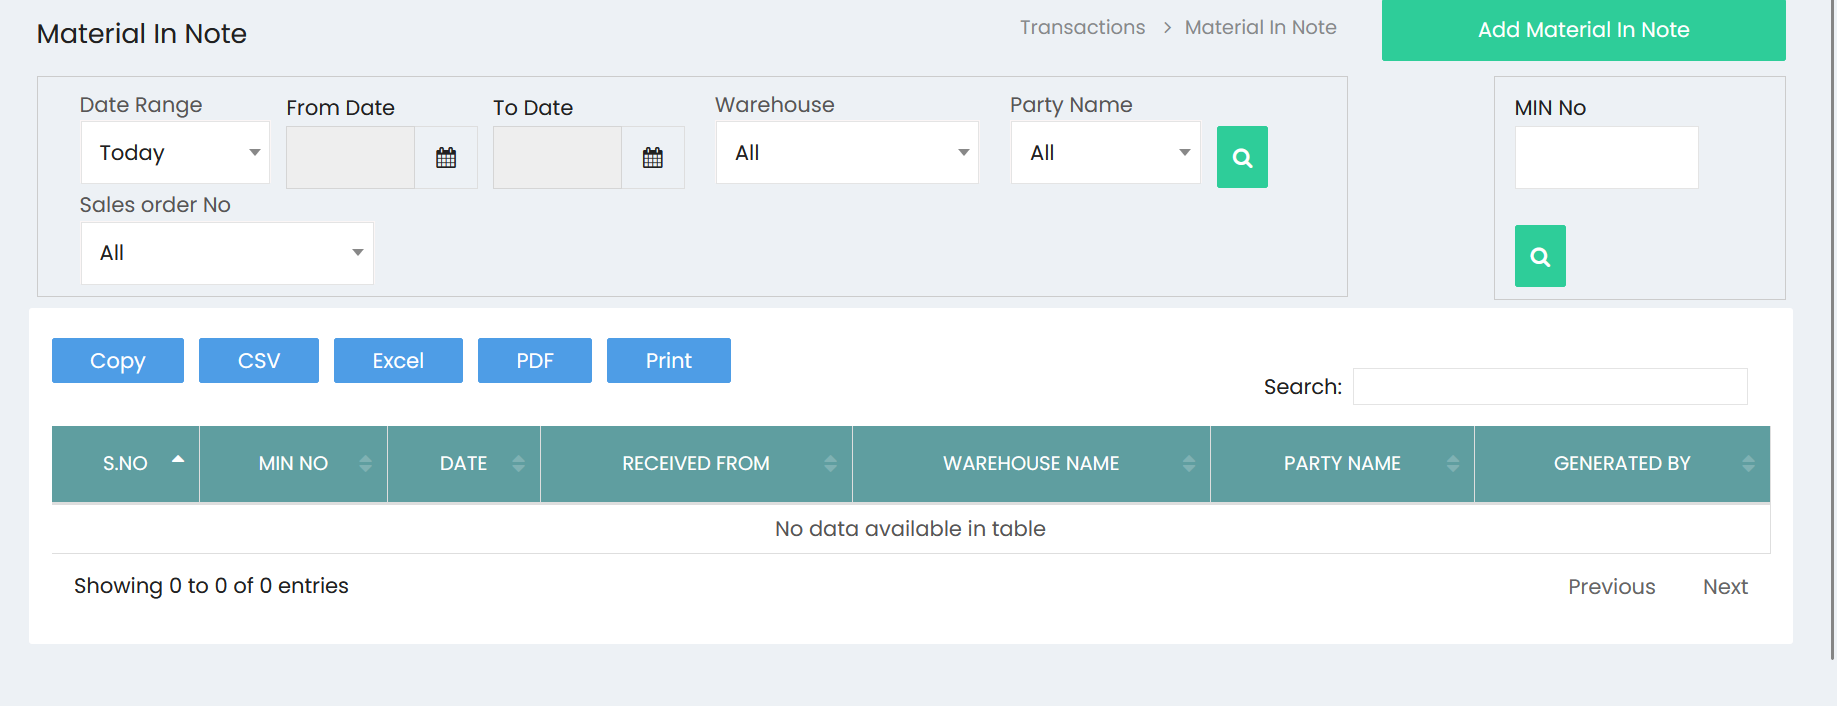
The Material In Note list displays all created material in notes.
The list includes the following information:
- S.No – Serial number of the material in note.
- MIN No – Material In Note number.
- Date – Date of the material receipt.
- Received From – Source or purpose from which the material is received.
- Warehouse Name – Warehouse where the material is received.
- Party Name – Associated party, where applicable.
- Generated By – User who generated the Material In Note.
Filters
The list can be filtered using:
- Date Range – Select a predefined date range.
- From Date – Specify the starting date.
- To Date – Specify the ending date.
- Warehouse – Select a warehouse.
- Party Name – Select a party.
- Sales Order No – Filter the material in notes based on the related sales order.
- MIN No – Search for a specific Material In Note number.
Click the Search button to apply the selected filters.
The list also provides options to Copy, CSV, Excel, PDF, and Print the displayed records.
Add Material In Note
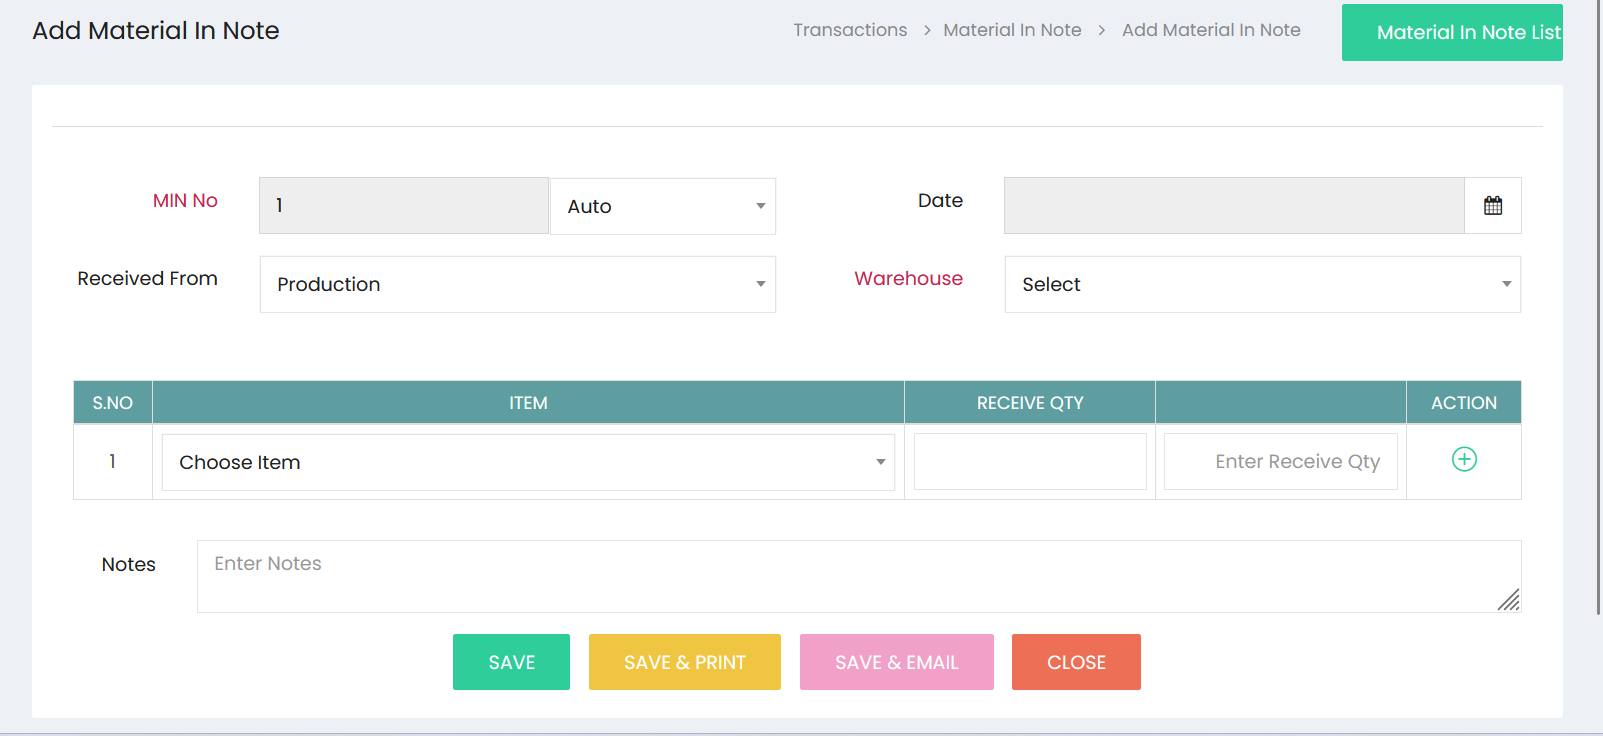
Click Add Material In Note to create a new material in note.
Material In Note Details
Enter the required information:
- MIN No – Enter the Material In Note number or use the automatic numbering option.
- Date – Select the date of the material receipt.
- Received From – Select the source or purpose from which the material is received. For production-related receipts, select Production.
- Warehouse – Select the warehouse where the received material will be stored.
Item Details
Add the materials received in the item table.
The table contains:
- S.No – Serial number of the item.
- Item – Select the material or product being received.
- Receive Qty – Enter the quantity received.
- Action – Add or manage item entries.
Click the Add button in the Action column to add additional items to the Material In Note.
Notes
Enter any additional information related to the material receipt in the Notes field.
Save Material In Note
After entering the required details, use the available actions:
- Save – Save the Material In Note.
- Save & Print – Save the Material In Note and generate a printable version.
- Save & Email – Save the Material In Note and prepare it for email.
- Close – Close the Material In Note screen.
Material Receipt
Once the Material In Note is saved, the recorded items and received quantities are maintained against the selected warehouse. The Material In Note provides a record of materials received for production or the selected purpose.