


Purpose
The Master List module is used to maintain predefined values for a selected master. Users can choose a master type, add new values, and manage the existing values.
Navigation
Master → Master List
Master List Page
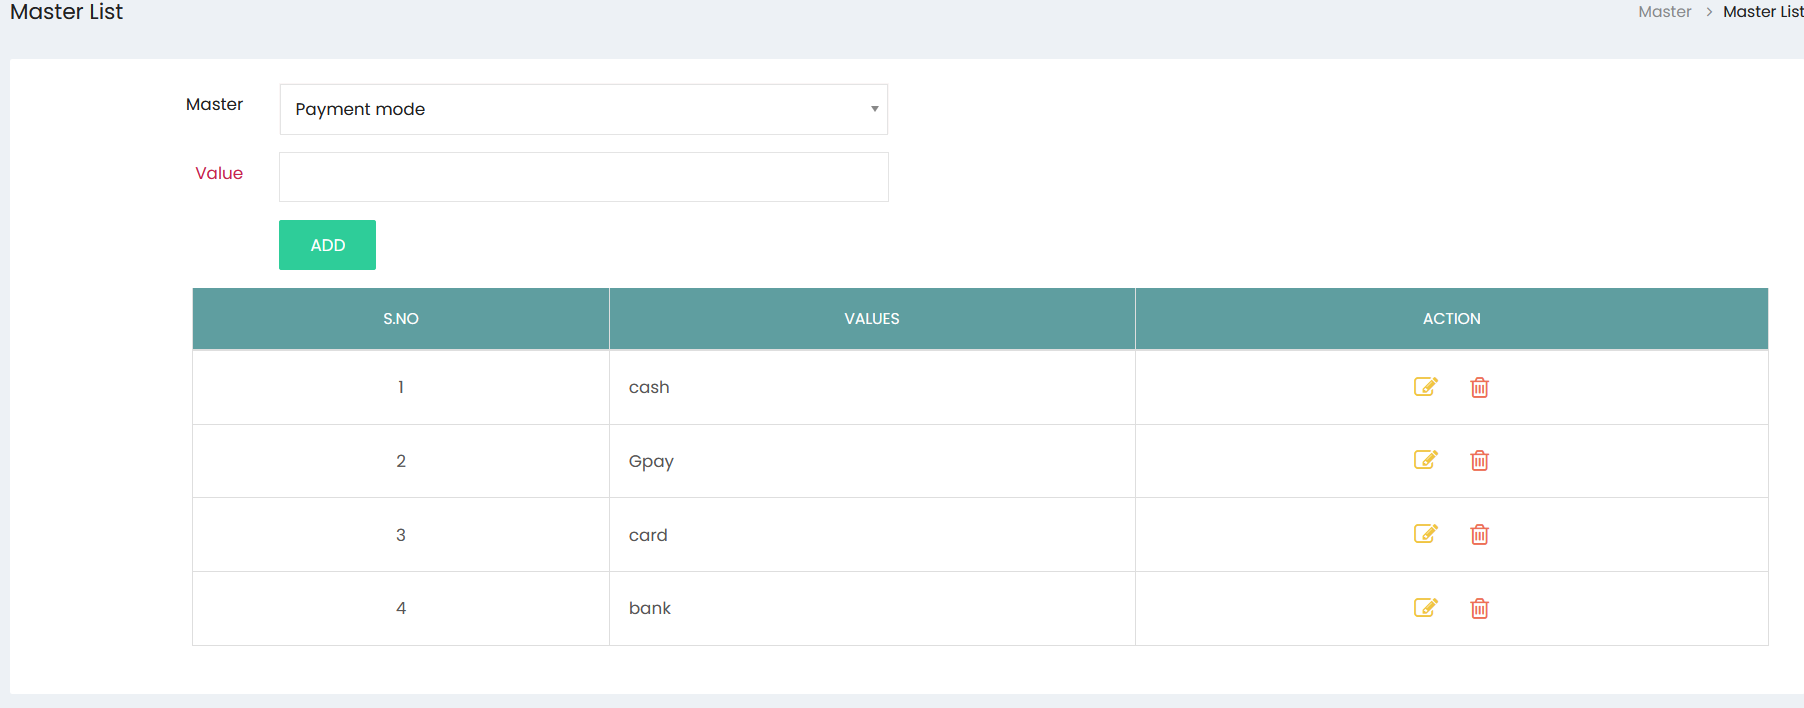
The page allows users to select a master, add values, and view the existing records.
Available Fields
| Field | Description |
|---|---|
| Master | Select the required master from the dropdown. |
| Value | Enter the value to be added. |
Available Button
| Button | Description |
|---|---|
| ADD | Adds the entered value to the selected master. |
Master Selection
A Master dropdown is available.
Values List
The list displays the values available for the selected master.
List Columns
| Column | Description |
|---|---|
| S.No | Serial number. |
| Values | Value associated with the selected master. |
| Action | Available actions for the value. |
Available Actions
Each record provides the following actions.
| Action | Description |
|---|---|
| Edit | Opens the selected value for editing. |
| Delete | Deletes the selected value. |
Workflow – Add a Master Value
Step 1
Navigate to:
Master → Master List
Step 2
Select a value from the Master dropdown.
Step 3
Enter the required text in the Value field.
Step 4
Click ADD.
Step 5
Verify that the value appears in the list.
Workflow – View Master Values
Step 1
Open Master → Master List.
Step 2
Select the required Master from the dropdown.
Step 3
Review the values displayed in the list.
Workflow – Edit a Master Value
Step 1
Locate the required value.
Step 2
Click the Edit icon in the Action column.
Workflow – Delete a Master Value
Step 1
Locate the required value.
Step 2
Click the Delete icon in the Action column.