


The Contacts section allows users to create and maintain individual contact records associated with customer accounts. Contact information includes personal details, job information, account association, location, social profiles, and source information.
Adding a New Contact
Click Add Contact to open the contact creation screen.
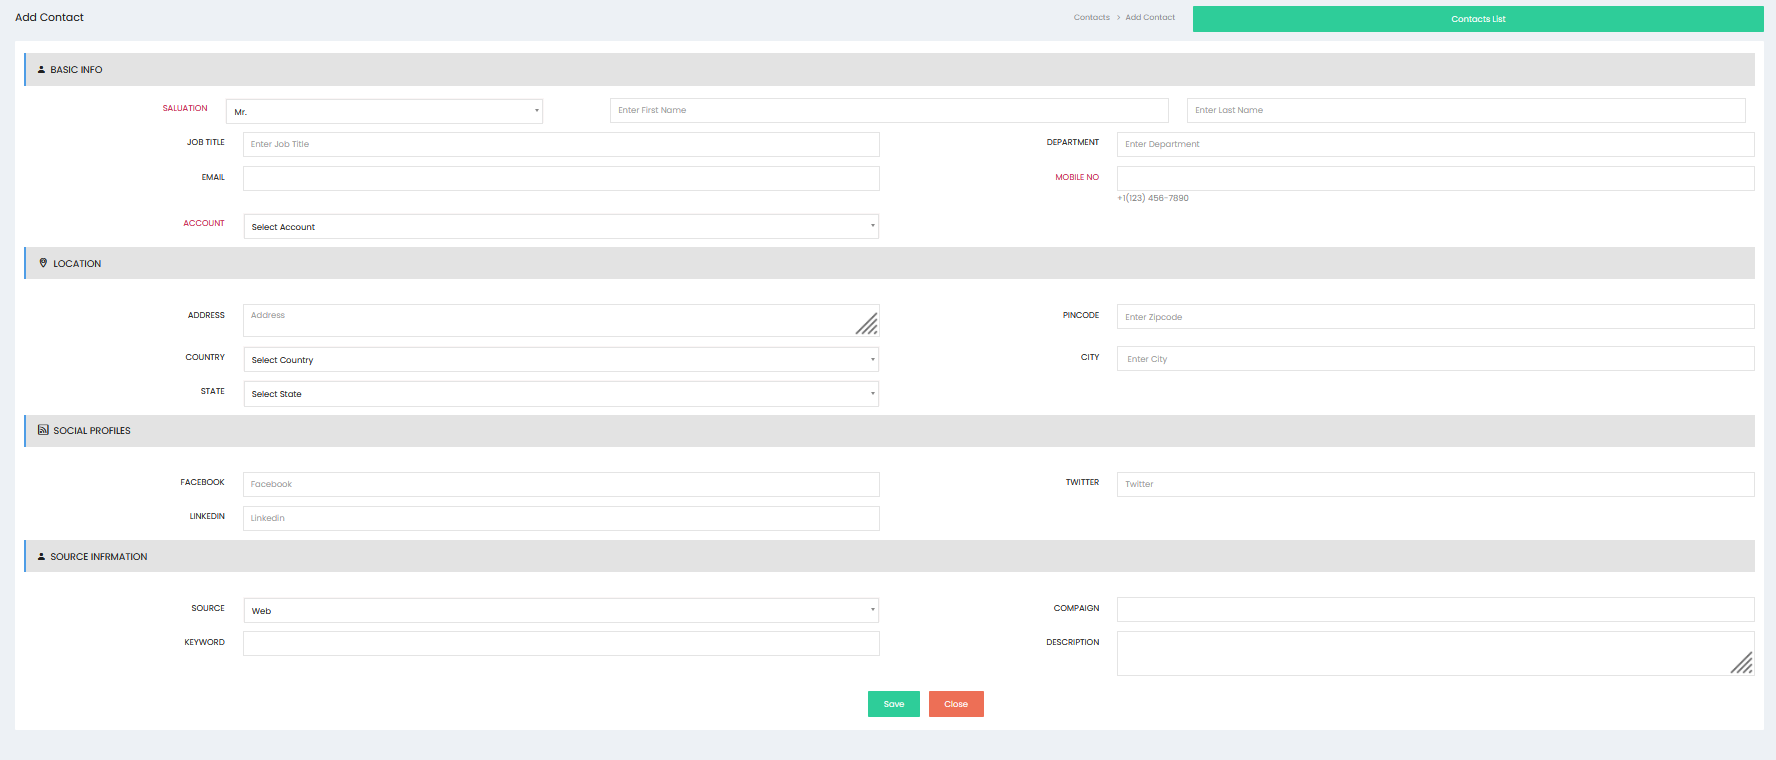
Basic Info
Enter the primary details of the contact.
- Salutation – Select the appropriate title.
- First Name – Enter the contact’s first name.
- Last Name – Enter the contact’s last name.
- Job Title – Enter the contact’s job title.
- Department – Enter the department in which the contact works.
- Email – Enter the contact’s email address.
- Mobile No – Enter the contact’s mobile number.
- Account – Select the account associated with the contact.
Location
Enter the contact’s address and location details.
- Address – Enter the complete address.
- Country – Select the country.
- State – Select the state.
- City – Enter the city.
- Pincode – Enter the postal or ZIP code.
Social Profiles
Enter the contact’s social media information, where applicable.
- Facebook – Enter the Facebook profile details.
- Twitter – Enter the Twitter profile details.
- LinkedIn – Enter the LinkedIn profile details.
Source Information
Enter information about how the contact was generated or identified.
- Source – Select the source associated with the contact.
- Keyword – Enter the relevant keyword.
- Campaign – Enter or select the associated campaign.
- Description – Enter additional information about the source or contact.
Saving the Contact
After entering the required information, click Save to create the contact. The newly created contact is added to the Contacts list.
Click Close to exit the contact creation screen without saving.
Contacts List
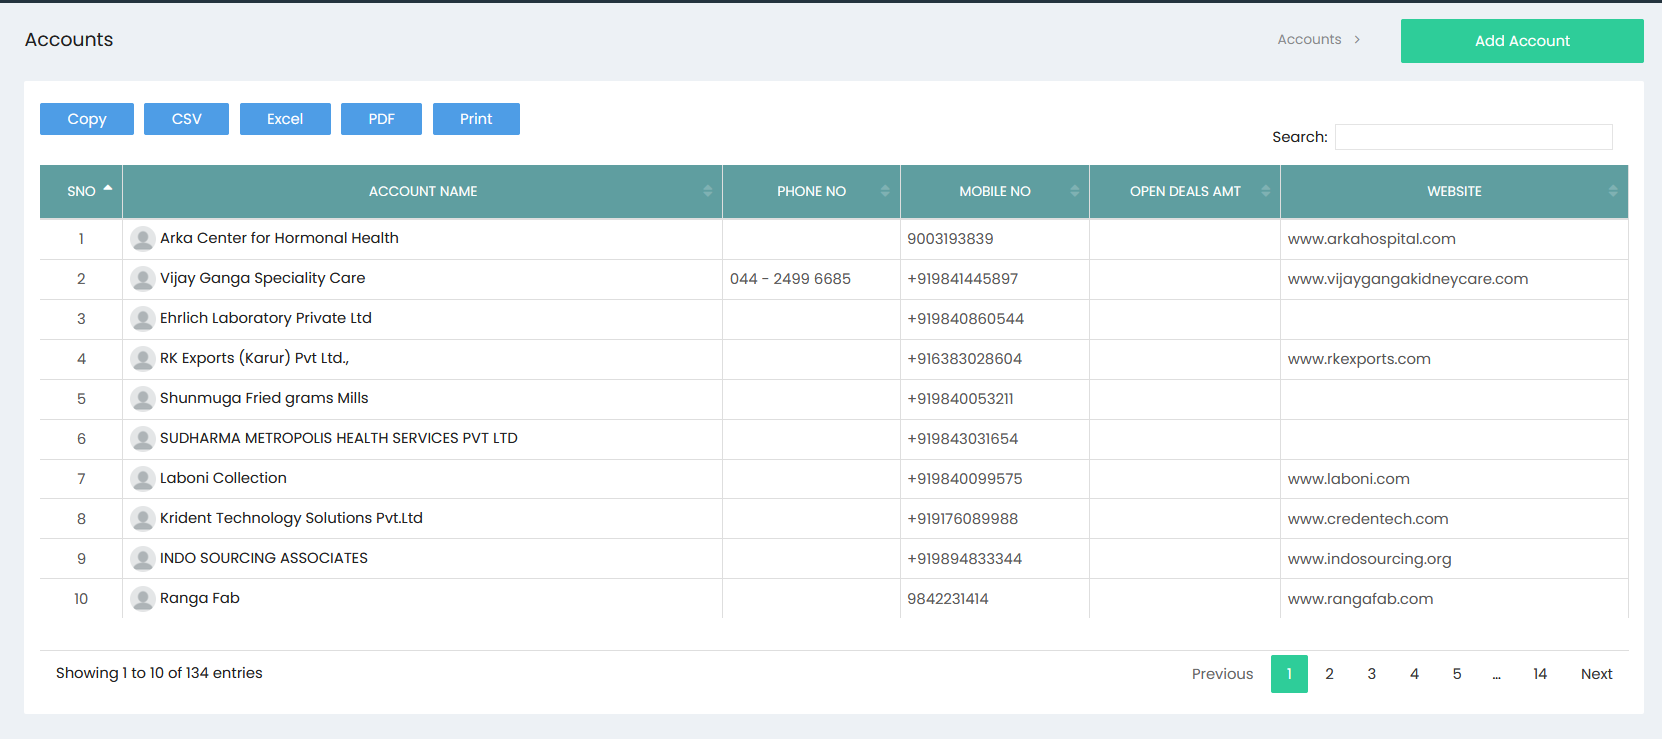
The Contacts list displays contact records with key information such as:
- S.No – Displays the sequential number of the contact.
- Name – Displays the contact’s name.
- Job Title – Displays the contact’s job title.
- Account Name – Displays the account associated with the contact.
- Department – Displays the contact’s department.
- Mobile No – Displays the contact’s mobile number.
The Search field can be used to locate a specific contact. The Copy, CSV, Excel, PDF, and Print options are available for managing and exporting contact information.
Pagination controls allow users to navigate through multiple pages of contact records.