


The Creating a New Lead screen allows users to record and maintain complete information about a potential customer, including contact details, location, social profiles, company information, deal details, and lead source.
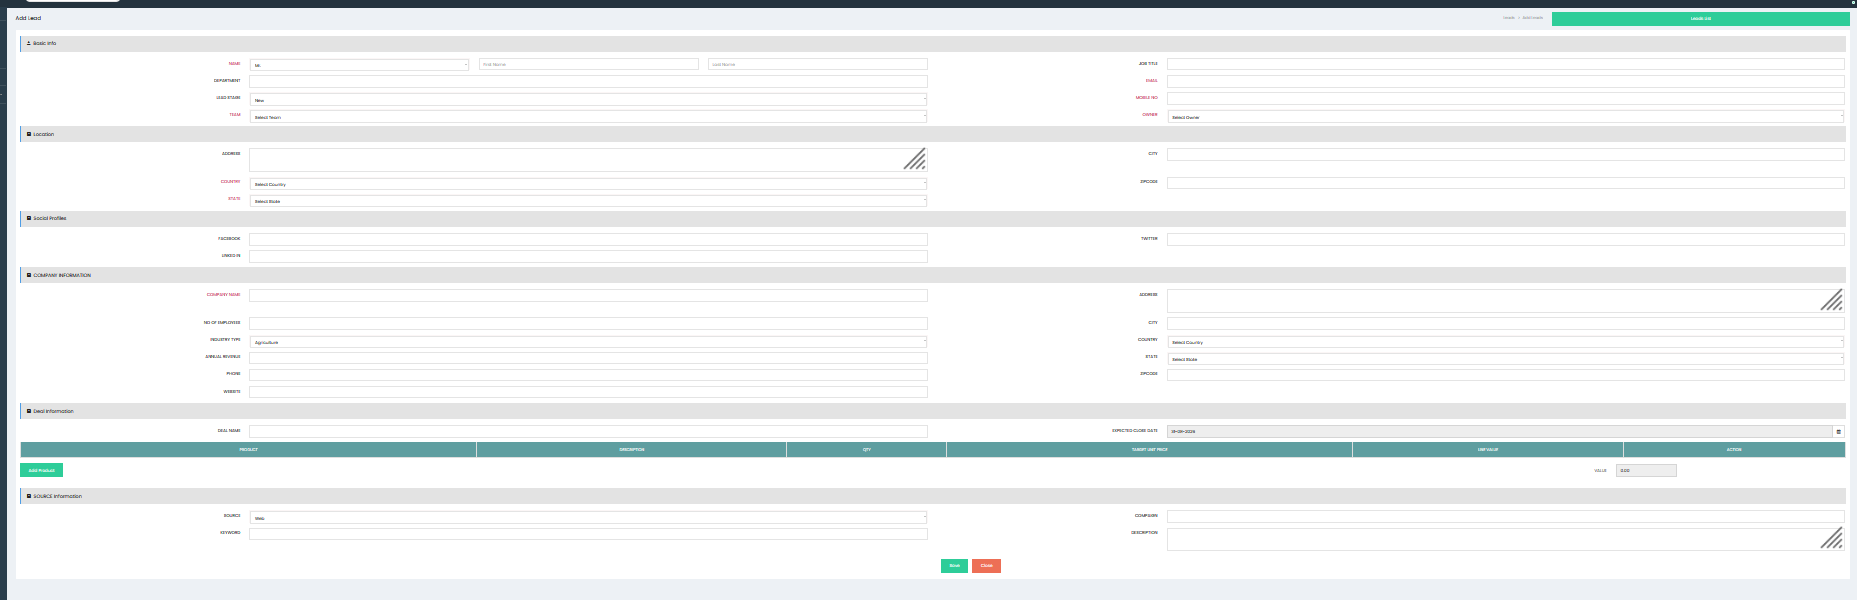
Basic Info
Enter the primary details of the lead in the Basic Info section.
- Salutation – Select the appropriate title.
- First Name – Enter the lead’s first name.
- Last Name – Enter the lead’s last name.
- Department – Enter the department associated with the lead.
- Lead Status – Select the current status of the lead.
- Team – Select the sales team responsible for the lead.
- Phone – Enter the lead’s contact number.
- Email – Enter the lead’s email address.
- Lead No – Enter or maintain the lead reference number.
- Owner – Select the user responsible for managing the lead.
Location
Enter the lead’s address and location details.
- Address – Enter the complete address.
- City – Enter the city.
- Country – Select the country.
- State – Select the state.
- Zipcode – Enter the postal code.
Social Profiles
Enter the lead’s social media information, where applicable.
- Facebook – Enter the Facebook profile details.
- Twitter – Enter the Twitter profile details.
- LinkedIn – Enter the LinkedIn profile details.
Company Information
Enter information about the company associated with the lead.
- Company Name – Enter the company name.
- No. of Employees – Enter the number of employees.
- Industry Type – Select the applicable industry.
- Annual Revenue – Enter the company’s annual revenue.
- Phone – Enter the company contact number.
- Website – Enter the company website.
- Address – Enter the company address.
- City – Enter the company city.
- Country – Select the company country.
- State – Select the company state.
- Zipcode – Enter the company postal code.
Deal Information
Enter details related to the potential sales deal.
- Deal Name – Enter the name of the deal.
- Expected Close Date – Select the expected date for closing the deal.
- Product – Select or add the product associated with the deal.
- Description – Enter relevant details about the product or deal.
- Qty – Enter the required quantity.
- Expected Unit Price – Enter the expected price per unit.
- Expected – Enter the expected deal value or amount.
- Action – Use the available action option to manage the deal item.
- Add Product – Add additional products to the deal when required.
- Value – Displays the total value of the deal.
Source Information
Enter information about how the lead was generated.
- Source – Select the source from which the lead was received.
- Keyword – Enter the relevant keyword associated with the lead.
- Campaign – Select or enter the campaign associated with the lead.
- Description – Enter additional information about the lead source or campaign.
Saving the Lead
After entering the required lead information, click Save to create the new lead. The lead is then added to the Lead Management system with the entered details.
Click Close to exit the screen without saving the lead.